OIDC Identity Provider
A personal project to build a complete identity provider from the ground up using .NET and OpenIddict. It explores multi-tenancy, JWT security, and the OpenID Connect standard.
Built With
- .NET
- OpenIddict


Technical Breakdown
The system is a standalone ASP.NET Core application that acts as the central security authority.
- .NET: The web framework foundation.
- OpenIddict: The low-level OpenID Connect server library.
- .NET Identity: For user and role management.
- Entity Framework & PostgreSQL: The data persistence layer.
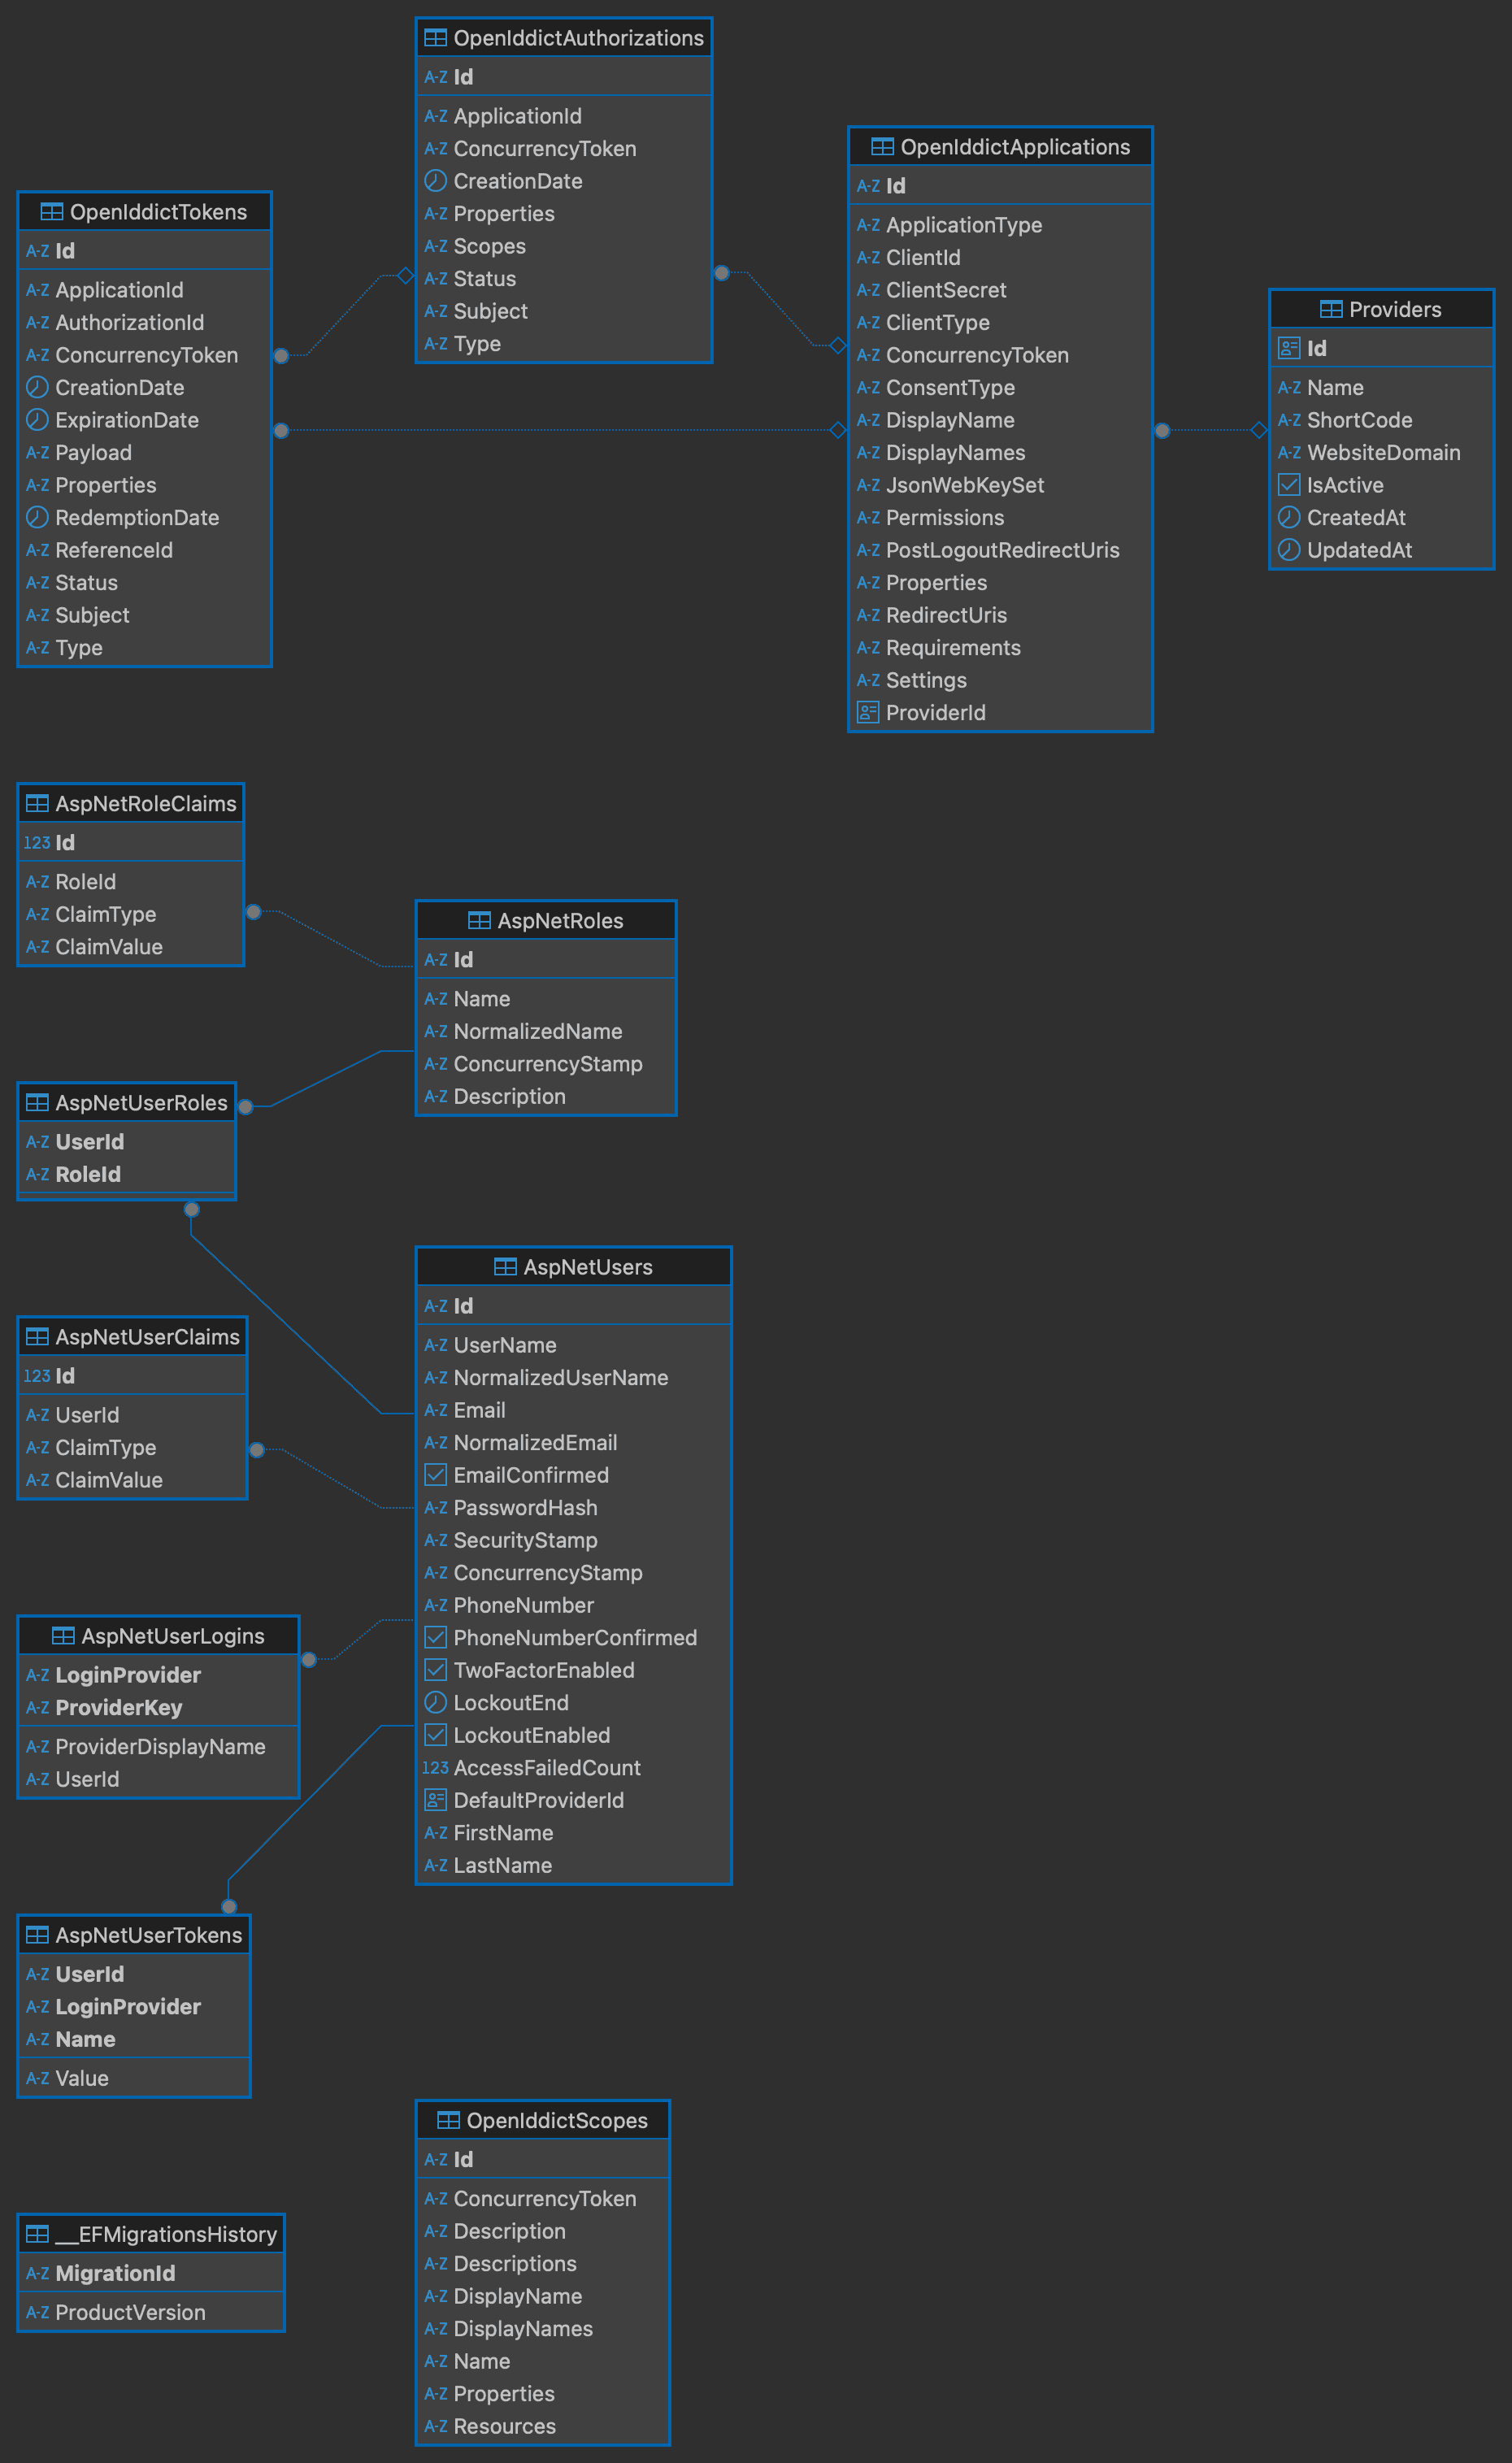
To support multi-tenancy, I extended the base Identity and OpenIddict models. The most important customization is the `ProviderId` foreign key I added to the `OpenIddictApplications` table, creating a direct link between a client app and its tenant.
The provider implements a set of standard OIDC/OAuth 2.0 flows to ensure security:
- Authorization Code Flow with PKCE: The primary and most secure flow for the Next.js client app. PKCE is enforced to protect against authorization code interception.
- Client Credentials Flow: For secure machine-to-machine communication.
- Refresh Token Flow: Allows applications to obtain new access tokens without forcing re-authentication.
All tokens are signed JWTs using a secure X.509 certificate loaded from configuration.
The database schema, managed by EF Core, is built on three pillars. The diagram below illustrates the key relationships between Providers, Users, and Client Applications.
A .NET Resource API can be configured to validate tokens from this IdP by setting the Issuer and expected Audience.
1// In a .NET Resource API's Program.cs
2            builder.Services.AddOpenIddict()
3                .AddValidation(options =>
4                {
5                    // Must match the public URL of the Identity Provider
6                    options.SetIssuer("https://identity.your-domain.com/");
7
8                    // This API will only accept tokens with this audience
9                    options.AddAudiences("my-resource-api");
10
11                    // Automatically discover signing keys and config
12                    options.UseAspNetCore();
13                    options.UseSystemNetHttp();
14                });
The `next-auth` library works perfectly for integrating a frontend client. The configuration points to the IdP's `.well-known` endpoint and maps the custom claims.
1// In a Next.js client's [...nextauth]/route.ts
2            export const authOptions = {
3            providers: [
4                {
5                id: "oidc-provider",
6                name: "My Identity Service",
7                type: "oauth",
8                wellKnown: "https://identity.your-domain.com/.well-known/openid-configuration",
9                clientId: process.env.OIDC_CLIENT_ID,
10                clientSecret: "", // Secret is empty for public clients using PKCE
11                authorization: { params: { scope: "openid profile email offline_access" } },
12                async profile(profile) {
13                    return {
14                    id: profile.sub,
15                    name: profile.name,
16                    providerId: profile.provider_id, // Our custom claim!
17                    };
18                },
19                },
20            ],
21            };